The How To page is for people who want to get their hands dirty, or are thinking about getting them all greased up. Just watch, learn and ask. Before you know it, you are building your own beauty’s. These posts will be a combination of collected information from the web and produced by our own.
In this post we try to help you on how to Mount a Cafe Racer Seat in 5 Minutes for 5 Bucks
This post will included many visual support, while this will help you the most. The sources used for this post can be found at the end. We hope this will help to solve wiring on a Cafe Racer (and other bikes).
Today the wrench monkeys at Kickwrench will show you a super easy, super fast and super cheap way on how to mount that cafe seat on your ride.
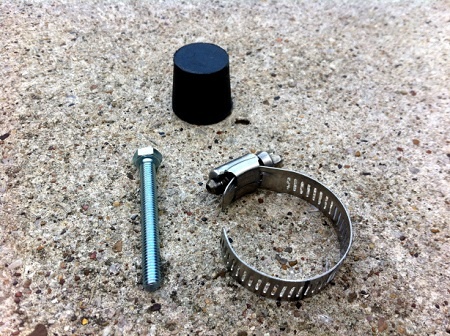
Supplies for mounting the cafe racer seat
- 4 rubber stoppers from the hardware store
- 4 bolts
- 4 nuts
- 4 hose clamps
- Some paint you have lying around the garage

Process
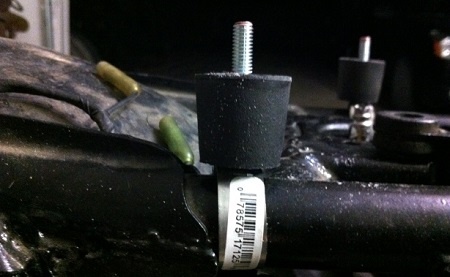
First, fit the hose clamps around your frame where the seat will mount. Mark the clamps with a sharpie on the portion that faces straight up from the frame. Pop the hose clamps off and drill a hole large enough to fit the bolt on your mark. While you have the drill out, drill a hole of the same diameter through the middle of the rubber stopper. Put the bolt through your hose clamp, facing outwards and slide the rubber stopper over the bolt. Fit the whole assembly back on the frame. Repeat 4x. It should look like this:
The assembled mount
Now, grab your seat, some paint and something to apply it with. We used red spray paint and a Q-tip. Apply the paint to the top of the bolts and fit your seat to the bike. The goal is to mark where you’ll need to drill the seat for the bolts.

Marked seat bolt
Once you have good, clear paint marks on the underside of the seat, grab your drill and punch a few holes. If you marked correctly, the seat will slide down over the bolts and you can tighten with a nut. Use your upholstery to cover the bolts/nuts. Wasn’t that easy?

Done!


